Getting started
Hardware/software requirement
Veda2.0 works on Windows portables, desktops, servers, and VMs, with Windows 8/Windows server 2012 or above. Microsoft Excel is a prerequisite.
Suggested hardware
Hardware needed depends on the size and complexity of models, but here is a configuration suitable for typical TIMES models under Veda2.0:
CPU: Minimum 4 cores are recommended for STANDARD and ADVANCED licenses. 8 - 16 would be desirable for larger models
RAM: 4-8 GB is enough for Veda, but GAMS needs more RAM for larger models. 32 GB would accomodate most models
HDD: 500GB - 1TB free space for Veda and GAMS files
- Veda accesses Internet for the following functions:
- Licensing
Source: provided on request
- Displaying announcements on the Start page
- Updating TIMES source code from Github
- Gams Engine for running GAMS jobs in cloud environments via REST API
Software prerequisites
Veda makes a local connection to a PostgreSQL database. In case you see “No database response” message on Veda startup and it does not go away, please make sure that the system firewall is not blocking Veda in making the said connection (This could require permissions from your IT department).
Veda uses Excel in background and in case of any pending popups in Excel that require user attention, Excel will not work which in turn will stop Veda to carry out important processes like synchronization of model. One such popup is the user sign-in popup, so we advise user to make sure they are signed in to Excel properly.
Installation
- It is recommended that the new user first takes a look at the video:
- There are two ways to go about it:
- Localhost: This just needs to be extracted
- Download and install prerequisites
- Download localhost
Give full read and write permissions to the folder where it is extracted
Port 65001 should be accessible to PostgreSQL
- Installer: This is a setup executable
- Download installer
Create a folder where you wish to install and give it full read and write permissions
Port 65000 should be accessible to PostgreSQL
Setting up GAMS
As part of registering VEDA2.0 a request is sent to the ETSAP Liaison Officer who will arrange for an evaluation GAMS license file to be created, sending it to the new user along with the download and install procedures here:
Copy the GAMSLICE someplace on your computer
Head to https://www.gams.com/download/ and select the Windows download option for either Win-64/32, as appropriate
Run Setup by clicking on it in Windows Explorer
Check “Use advanced installation mode” at the bottom of the GAMS Setup form
Let GAMS get installed into the default folder (GAMS<Win#><ver>
Have the GAMSLICE.TXT copied from wherever it currently resides to the GAMS directory
Verify and add the GAMS directory to the PATH environment variable
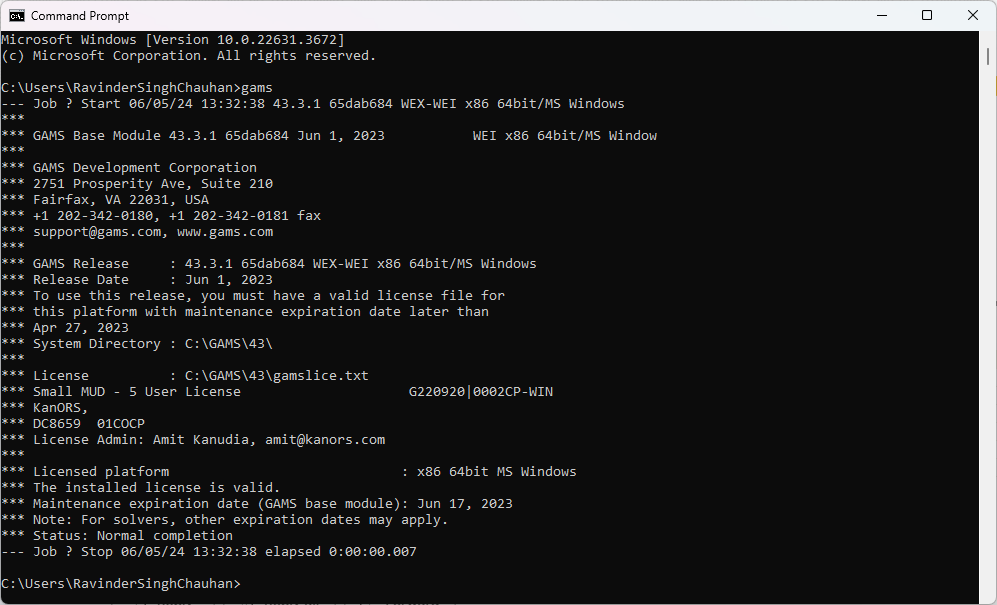
- After installation, open a Command Prompt and type “gams” to see if GAMS is recognized
- If GAMS is not recognized
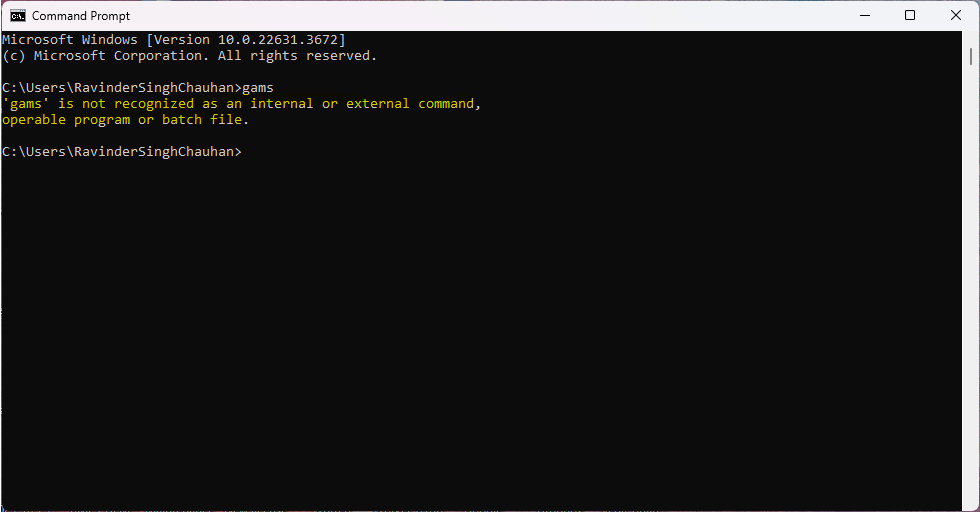
Follow the below steps to add GAMS directory Path to the environment variables.
- Let suppose your GAMS installation directory Path is C:\GAMS\32

- Steps to add GAMS directory path to Environment Variables

- After clicked on Environment Variables > {System variables} Path > Edit

- Click on New and add the GAMS directory path (C:\GAMS\32) to the list
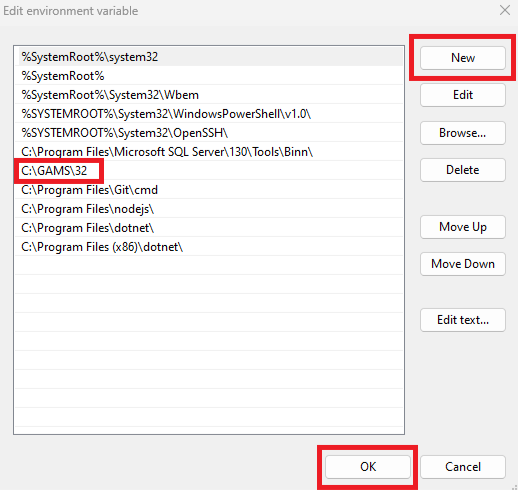
You may need to restart your computer to have the GAMS Path activated.
Once you have VEDA installed you can try a TIMES model run.
Uninstallation
Installer version:
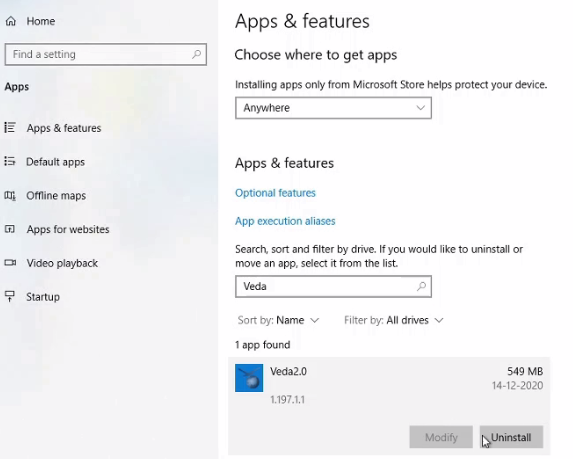
If you installed Veda 2.0 using installer, the process of uninstalling is very straight forward.
- Steps:
Go to Control panel
Select Veda 2.0 and click uninstall
Make sure that Postgres has also been removed. Usually the process of uninstallation also removes Postgres from the computer
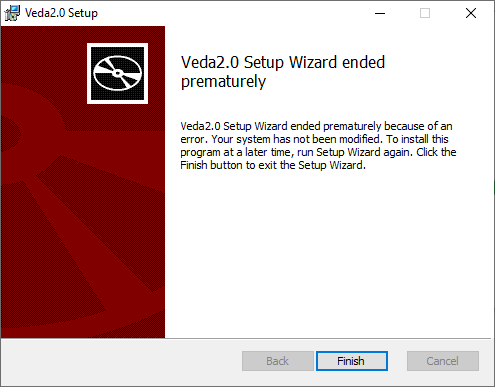
Sometimes uninstallation ends prematurely (image below) and Postgres is not removed. In such case, please go to Uninstalling Postgres for further instructions
Localhost version:
Launch the Veda2.0 version you are using
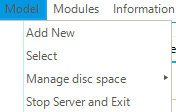
In the main menu -> Model –> Stop server and exit
Now you can go ahead and delete the localhost directory
Backup and Restore
The Backup and Restore feature makes upgrading Veda much easier. You can back up the “state”, meaning, all models that are synchronized, and all Cases that are imported in Veda. This is available starting version 230.
Steps:
Backup
- Go to Model > Backup state
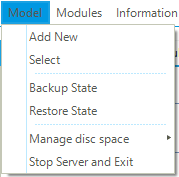
- Save the backup file in a directory of your choice
Go to Model > Stop server and exit (Terminate Veda)
Restore
Launch the new version of Veda
Go to Model > Restore state, to restore your models and cases
Select the saved backup file
- Once the file is loaded, you can select the models/cases that you want to get restored
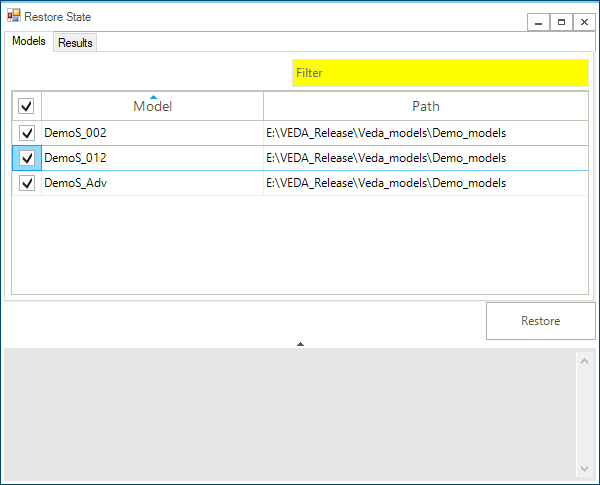
Click “Restore” to synchronize all selected models and import all selected cases
Updating
The process of updating requires the user to uninstall the old version and install the new version of Veda2.0 manually.
- Refer the following links for help: